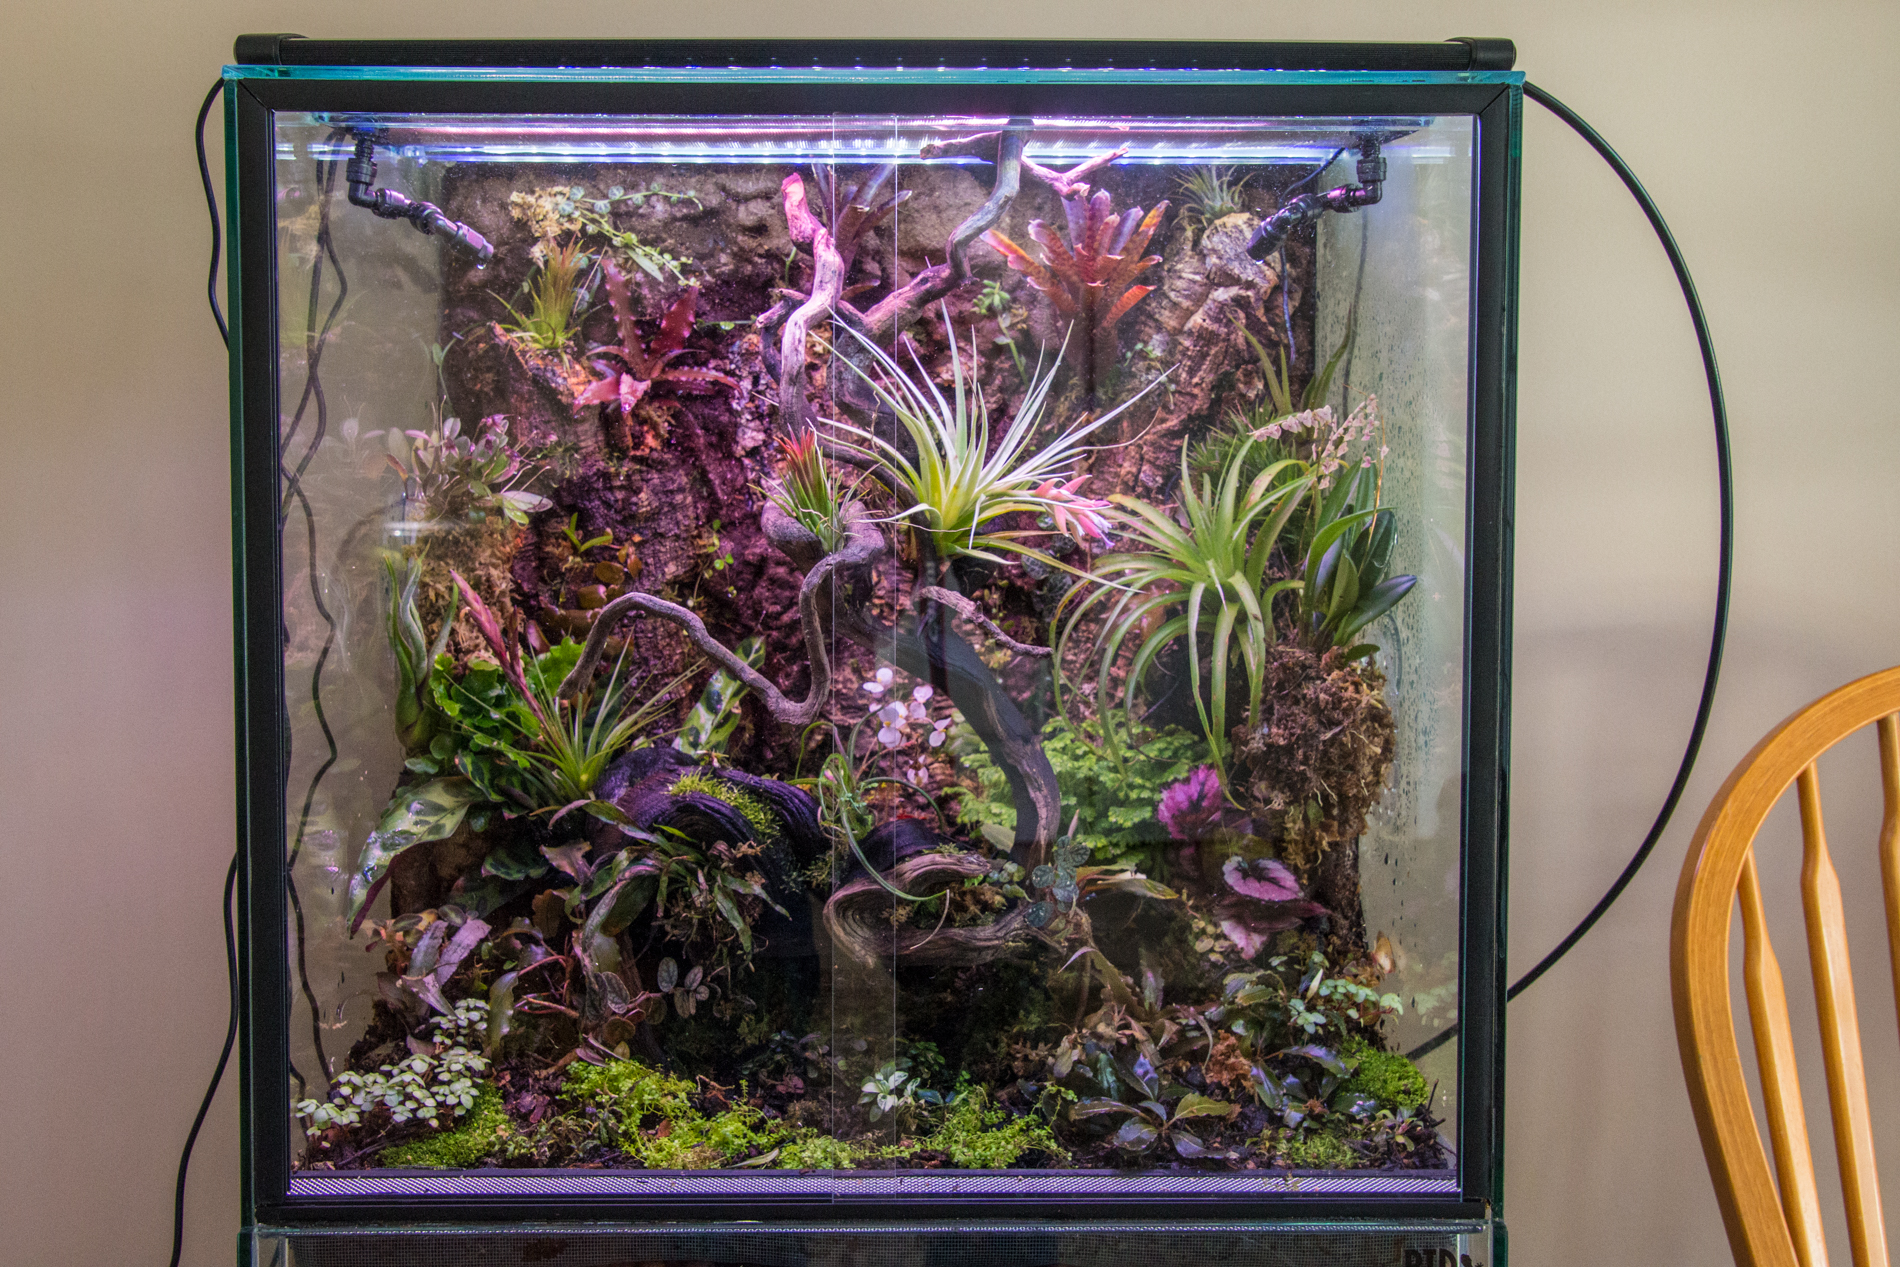
EuroStyle Vivarium
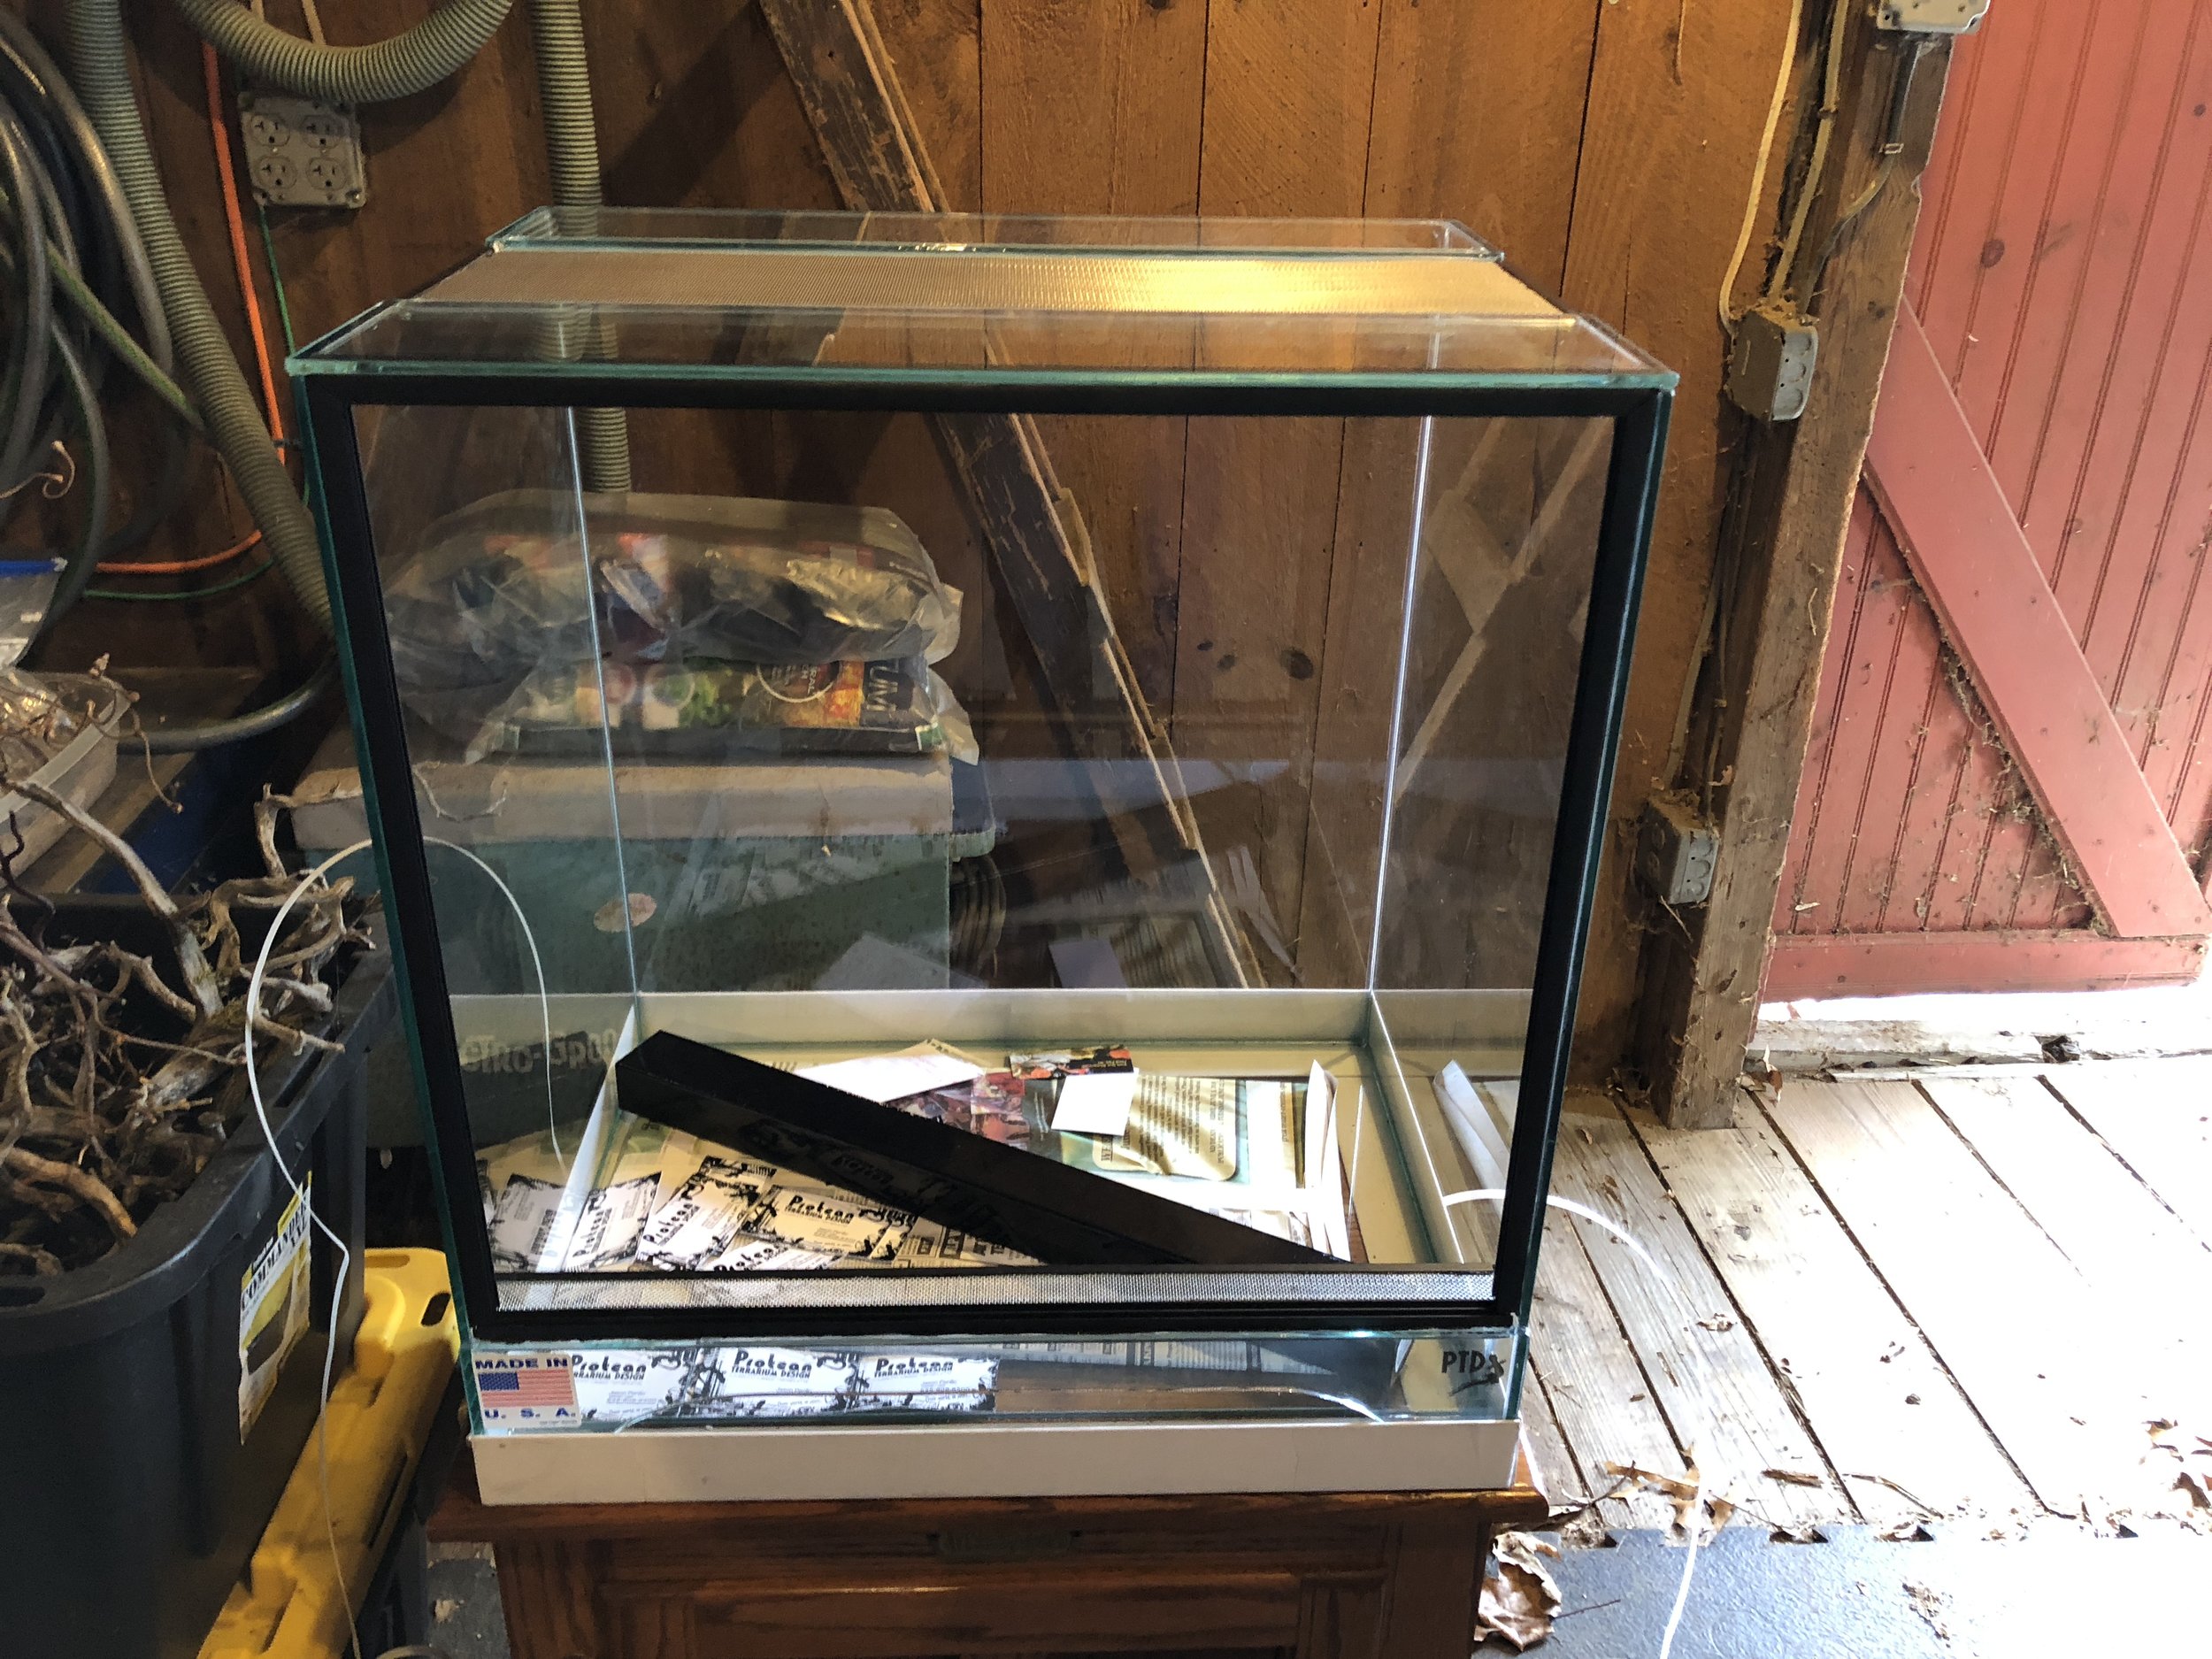
Nothing like jumping in the deep end. I saw this beautiful piece of glass, empty, diagonally across from our Aquatic Gardeners Association Booth at Aquatic Experience last fall.
I had had the vague idea of picking up a small vivarium at the show, but this was quite a bit bigger than anything I THOUGHT I was thinking of.
“I can get that home in my car!” (along with the three other (fully aquascaped) display tanks I had brought for various booths, plus another beautiful tank I had been gifted. Sure! As long as I didn’t also need a place to sit! Well, as it turned out, by playing Tetris, and with a bit of help from my dear friends Sheila Garl and Gavin Dalton, I DID actually get everything in, and was actually still able to drive the car home. (in spite of a stop to have a quickly failing tire replaced) Then I put it in the barn and it sat there. For for two solid months. Because I was afraid.
My beautiful, empty vivarium sitting in the barn.
I, who would happily aquascape an aquarium on a moment’s notice was afraid of this glass box without water. I had no idea where to start. So, I did what I usually do in such a situation. I started researching. First I contacted a couple of friends who I knew had experience with vivariums, Anna Howard, who is one of my co-admins on our Face Book group, Planted Nano and Betta Tanks, and owner of Engaging Ecosystems, and Cara Wade, who is THE guru of aquarium lighting, but also a partner in crime when it comes to enjoying growing Aroids and other emersed aquatic plants, and whom I knew also had experience with vivariums and paludariums. They soon introduced me to a few reliable online sources as well, which I will list in the resources tab. But one person I discovered on those groups, in particular, has become SO important to me I will single him out. And that is Cory Nudelman, admin of Vivarium Terrarium Plants and Inhabitants. He has become the third person I’ve come to count on for absolutely reliable information and to help talk me down off the occasional cliff during real (or perceived) crises.
At the end of December 2018, I brought the tank indoors and started to work on it. There are a lot of ways to set up a vivarium and you will find a lot of people who are adamant that their way is the best way, or sometimes the “only” way something should be done. I’ll tell you what I did, and why I made a specific decision if I can. But be aware that you may come to different conclusions than I did.
For the background of my vivarium, I decided to go with a combination natural cork and expanding foam background. I bought my cork from Josh’s Frogs who had the lowest price I could find for large quantities. I decided on the black Pond and Stone Great Stuff, so that I didn’t have to worry about the white of the lighter types showing through.
For all work on the background, I laid the tank on its back, so that I didn’t need to fight gravity. Some people have branches sticking out of the back wall, and if you do that, you need to find a way to support them until the foam has set, either with masking tape, string, temporary supports of some kind, etc. I knew I was using this beautiful piece of Manzanita, which would be free-standing, in front of the background. So there was no need to monkey with that.
Manzanita is one of my favorite Aquascaping woods, so it only made sense that I would use it in my vivarium build. I get all my Manzanita from Tom Barr.
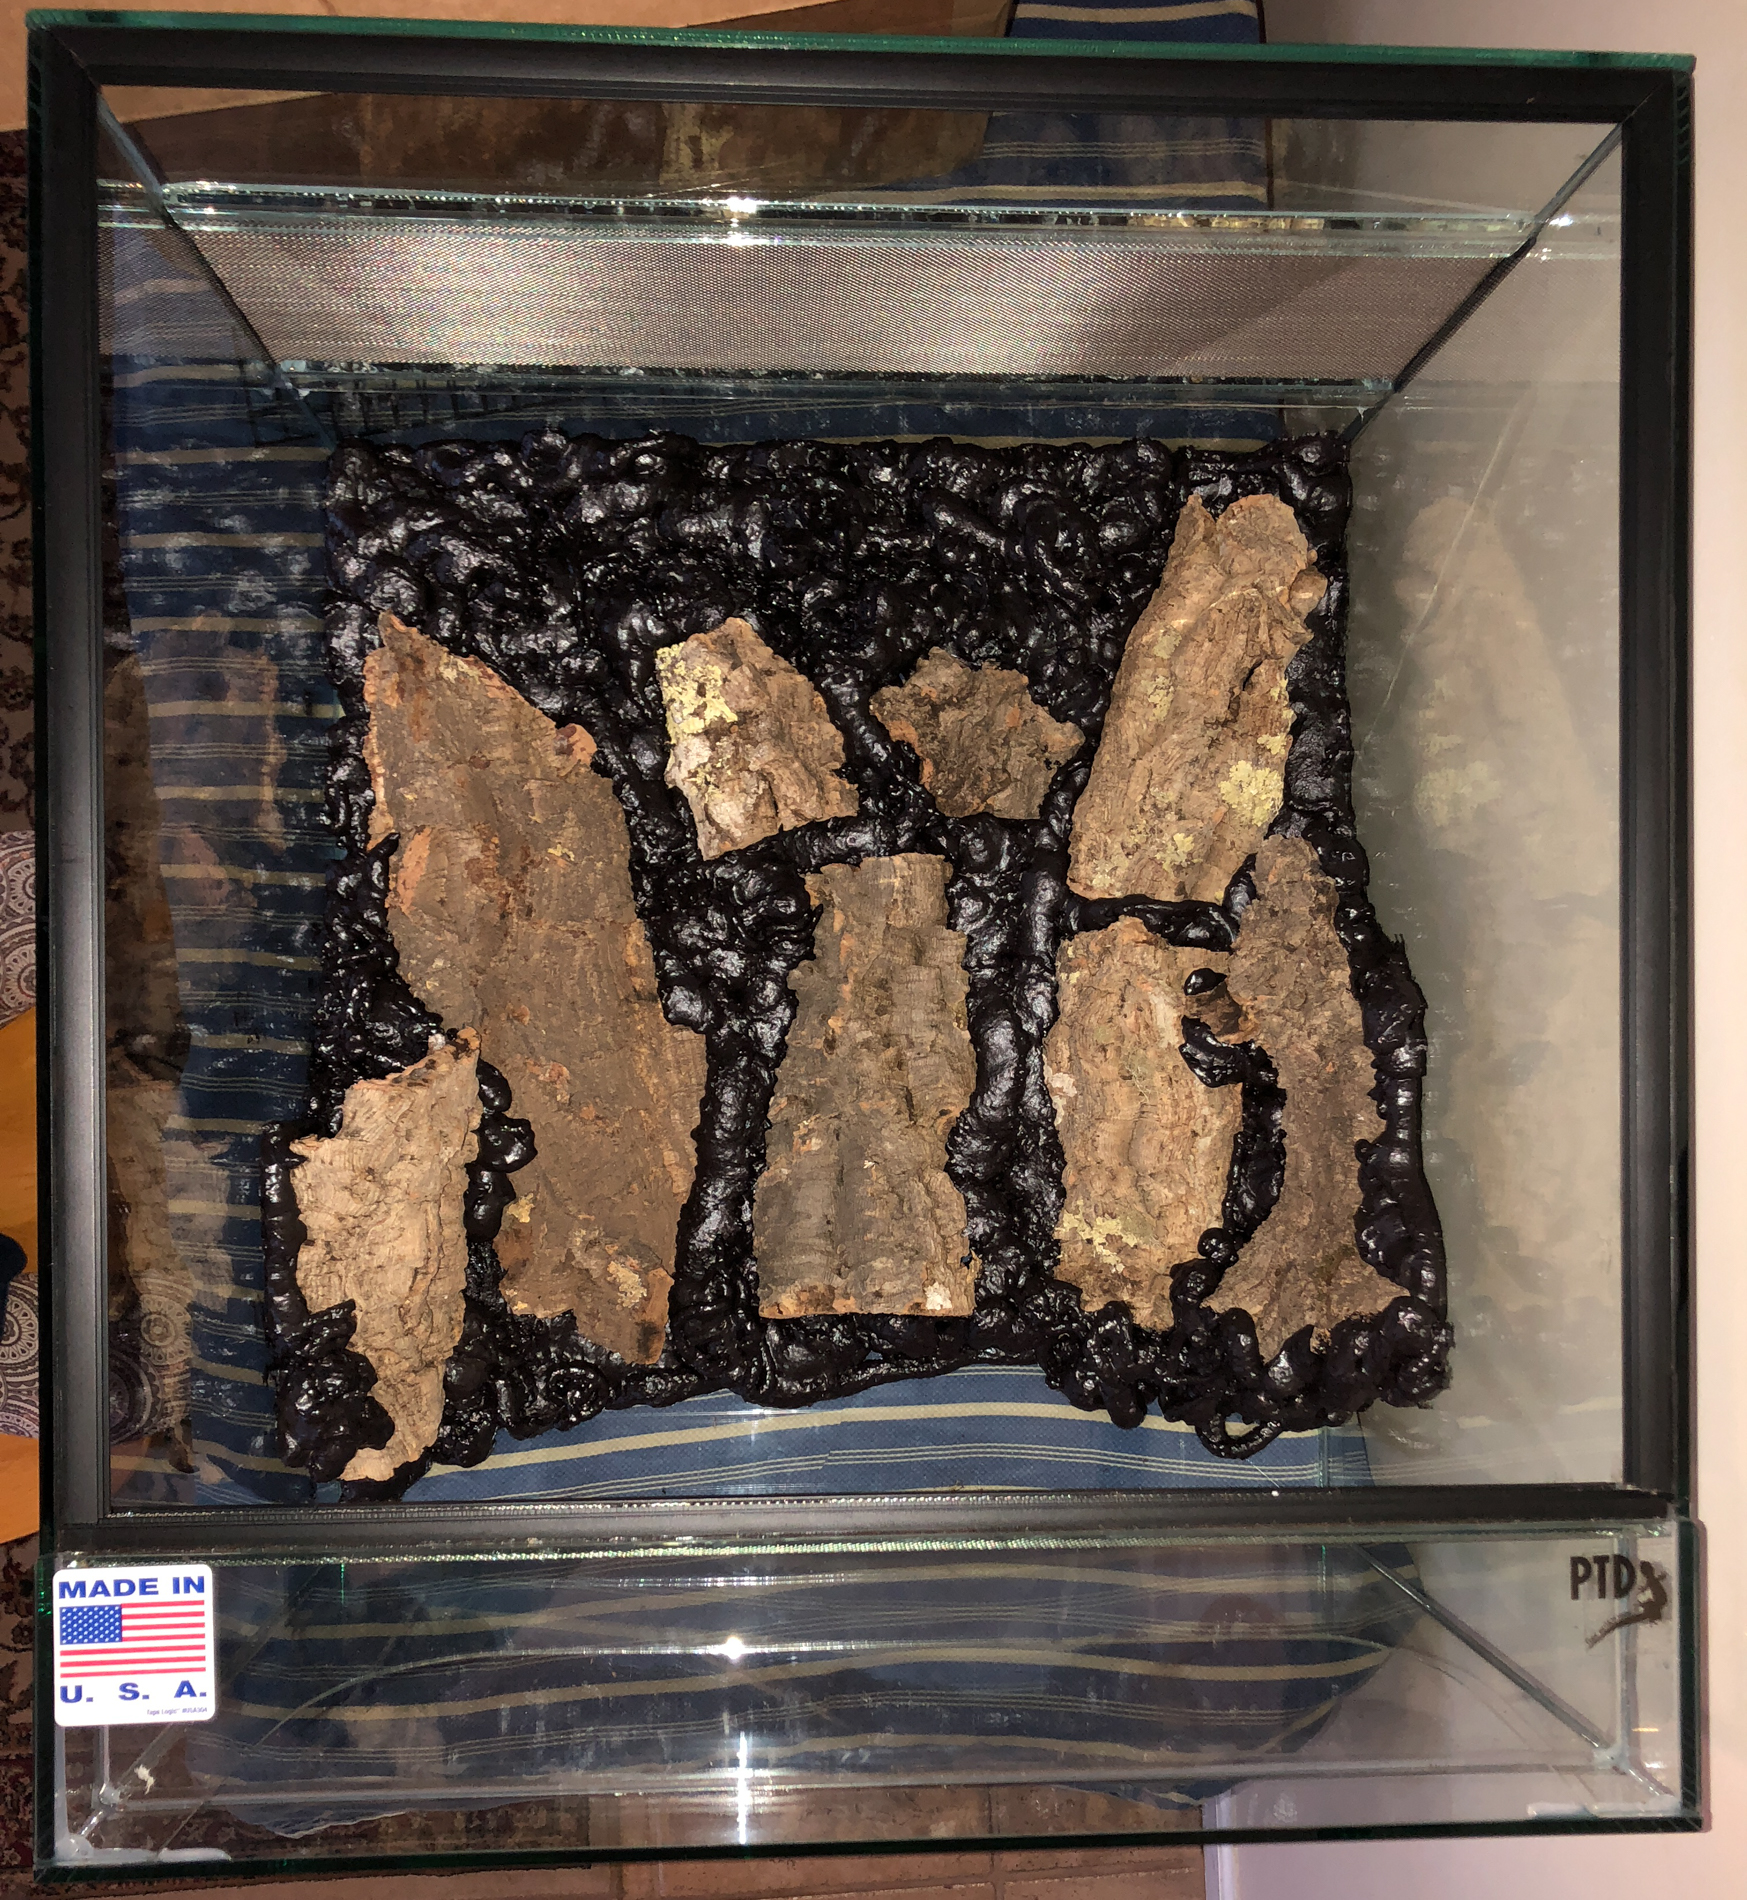
I first siliconed a piece of egg crate to the back of the tank to give the foam a firm matrix to hold on to. Then I fitted my cork pieces in. I wanted the grain to run vertically, as tree trunks would, though I know many people don’t care. I used cork rounds in the lower corners to act as small elevated planters and to bring the background partially around onto the sides. Make sure you wear gloves and protect your work surfaces, but foaming is fun! Expect it to foam up quite a bit, but don’t worry about it either. You will end up carving a lot of it away once it hardens.
I dry fitted the pieces first to figure out how best to fit them in the space.
This is a side view, showing the wood siliconed to (and through) the egg crate. The egg crate is also siliconed to the glass.
All the Great Stuff Pond and Stone has been applied and has set at this point. You don’t need to go below where your substrate will be.
It is important to carve off the shiny top layer of the foam, so that you can cover it most easily with something more attractive, like coconut fiber. But it also makes it more attractive to carve it into more rock-like shapes than to leave it in the lumpy, rounded shapes it dries in on its own. Plus, it’s FUN! Don’t get carried away getting too detailed, however. Within a few months your plants will have it all covered up anyway.
Here the foam has been carved and prepared for the coconut fiber. I had placed the tank upright, just to check the placement of my Manzanita before applying the coconut fiber. The Manzy is sitting on a baking pan to simulate the added height of substrate.
The next step is to apply the coconut fiber. This is partially for looks, but it also holds moisture and gives the plants a rough texture that they can cling to more easily as they climb the back wall. Many people use silicone for this step, but Cara Wade suggested that I use Gorilla Glue instead, as this is the same chemical as the expanding foam. Having used both adhesives, I would never use silicone in this application, honestly. Silicone is very fumey; Gorilla glue is much less so. Though you should still use both in a well ventilated area, you can’t help but have your face down close to the enclosed glass area as you work. You do need to use gloves with either product. They both get messy. Any moisture will keep silicone from adhering well. Gorilla glue doesn’t set without some moisture. So you can take your time brushing it on, then apply handfuls of coconut fiber and spritz with a spray water bottle to set it. You need to come back every 15 or 20 minutes or so and pat down any places that are foaming up with a little extra coconut fiber. It doesn't foam up like the Great Stuff, but it does foam a little, and you don’t want it to show. If youmiss a spot here or there, just brush on a bit more Gorilla glue and apply a bit more coconut fiber.
In the end, you will have a very attractive and natural looking background, that will also be easy for your plants to climb. You can also see the cork round “planters” more easily in this photo.
During this entire procedure, I found that I had two best friends. Patience and my trusty shop vac! You will need the shop vac for vacuuming up all the carved out pieces of Great Stuff, and again for all the excess coconut fiber. Making a vivarium is a messy process and there is no way to rush it. Each step requires at least a day of curing time before you can move on to the next. Enjoy the process, and don’t try to cut corners. And this is just the beginning of your need for patience. In that way it is no different than a planted tank or an outdoor garden. And that is part of its charm!
This is about what my entry way looked like for about three weeks during the build!
While I was working on the background, (and twiddling my thumbs during drying times) I was also working on sourcing a cabinet or stand for the vivarium. I knew I would be using a MistKing system, so I wanted an enclosed cabinet that would hide that equipment. It is right in our formal entry way, so I needed it to look nice. I had found a local guy would would make me a custom stand for $200 (If I had another made at the same time). Which really seemed pretty reasonable. But still, this project was getting expensive, so I kept looking. I saw a lot of possible cabinets and occasional tables available on Face Book Market Place, and contacted each one asking for dimensions. Most were not deep enough front to back. Then along came this cute reproduction oak ice chest. It fit perfectly, was in great condition, and not far away. Best of all, it was only $25. Dave cut a couple of holes in the back for the wires and tubing for the MistKing to go through, and I was in business!
The next step was the drainage layer and substrate. I have read enough that I am fully convinced that a drilled bottom or side with at very least a drain, if not a moving water feature to prevent stagnant water is the gold standard for a larger vivarium. However, this is a modest size vivarium, at 22”wx16 1/2”dx24"t. It is also my first, and I was afraid to get too complicated. I was especially reluctant to try to drill a hole into my beautiful glass tank, when I had NO experience doing this.
So I went with what I have found to be a very simple to install, simple to use and utilitarian drain system based on the concept of a dry well. I took a short piece of PVC, just tall enough to stick up though all layers of drainage and substrate. I drilled a hole in the bottom (actually my husband did, since I am not good with power tools!) and siliconed this to the bottom of the tank. The drill hole allows water to enter the tube, and as necessary, I can siphon water out through the tube. I’ve only siphoned water three time in 6 months and only one of those times was critical, and caused by a timer failure on my Mist King. I keep the top of the tube covered with a piece of cork, to keep things from falling into it and to disguise it in the tank. You really can’t see it at all. You have to know where it is to even find it.
If I were building a tank from scratch, or custom ordering a tank, especially a larger one, I would ask for it to be pre drilled, or have the appropriate panels pre-drilled. I still think that I would be reluctant to take a chance with a tank I’d spent a lot of money on, when this “low tech” method works perfectly well.
Drain pipe and Leca installed.
Next step was the drainage layer. Some people build a false bottom out of egg crate to keep weight down. There is nothing wrong with that method, but I didn’t really need to keep weight down that much so decided to just go with a layer of Leca, which is expanded clay balls. These are widely available in hydroponic shops these days, and inexpensive. Rinse them first, as they tend to be dusty. I put a layer of about 2 1/2” of Leca in. Then I placed a layer of fiberglass window screen over the Leca, to keep my planting substrate from falling through.
Leca covered with the fiberglass screen.
I forgot until I was going through my photos that I also put a layer of horticultural charcoal down below the ABG. I have since been told by many people I trust that this is not strictly necessary, and the ABG mix already contains a fair amount. But it can’t hurt either. Take your choice!
There are a lot of different ideas on what makes the best substrate in a vivarium. Some like a fairly inert substrate and plant directly in lava rock rubble. Some people use aquarium aquasoils, and many people use a mix called “ABG”, for “Atlanta Botanical Gardens”. It turns out, there are as many recipes for “ABG - like” substrates as there are people and companies making it. nIt’s not totally clear to me whether “ABG” is one thing, or whether Atlanta Botanical varies it based on the enclosure they are using it in. (which honestly seems most likely) The bottom line is that it needs to break down very slowly and drain very well, while having SOME organic content. Beyond that, it can be assembled flexibly, to meet your specific needs. When I set my vivarium up, I didn't know enough about it to make any good decisions about making my own, so I simply bought it. I bought some from three different well known companies. Josh’s Frogs, NE Herp, and Glass Box Tropicals. All these companies have good reputations and all these products were a little different in composition. I mixed them all together for my substrate, and I have been happy with it. I now make my own “ABG mix”, but that will be a future blog! The actually substrate depth is about 2” in front, and about 3 1/2” in back.
I realized I didn’t take a photo with just the ABG or even just the ABG and the Manzy in place. Hey, I was getting anxious to get going! This is as close as I could get. The substrate meets the front vent height-wise in front, then slopes up to be about an inch deeper in back. At this point, I hd just thrown all the (still) potted plants into the tank to get an idea how things might look!
The final stage of preparing the substrate was adding “critters”. The most important part of the “animal life” in a vivarium is springtails. There are lots of places that you can buy springtail cultures, the company I used was Critters Direct. You can find plenty of directions on line for setting up a culture of springtails at home, and I suggest that you do this. Once you have used them in one vivarium, you will want to put them in every enclosed planted container that you make, of any size! And they are really easy to keep. I put half of my culture into the vivarium and the other half into a culture that I set up for future use. I have used that culture time and again, and always have plenty to draw from! I don’t have any good photos of springtails to share with you. (they are REALLY tiny!) But Google springtails and you will find lots of information. If you plan to only keep plants in your vivarium you probably are best adding only springtails.
If you your plan is to add animals such as dart frogs or day geckos in the future, you may want to consider seeding the vivarium with the smaller species of isopods such as dwarf white and dwarf purples. These will help process any animal waste into fertilizer for your plants, but will, for the most part, leave your plants alone. They also serve as a built in food source for your animals to forage when they feel the need for a snack. They won’t be enough for the sole food source for your animals, but they give them a natural, ongoing food source to hunt each day. The larger, “prettier” isopods are likely to snack on your plants, and they will also, definitely, eventually break down wood, including cork. That isn’t something I want going on in MY vivarium!
Lighting was more complicated than I expected. I come from the world of planted aquariums. I understand aquarium lighting. For a vivarium, the light isn’t even traveling through water. How tough could this be? It turns out, that while getting enough light to grow plants isn’t hard, getting a good color mix, so that you are pleased with the LOOK of your tank is a whole different kettle of fish. I’m not going to even go through all the different permutations of lighting I went through that I DIDN’T like.
I will tell you some general conclusions. LED mixed color aquarium lights, where there are red, blue, green and white diodes in the same light look absolutely terrible. Stick to LED lights that are either all white diodes, or at most, white and blue diodes. If you want, you can add a TOUCH of red at the back of your tank to brighten up your Neoregelias. Most vivarium plants are understory, forest plants. They don’t really need a ton of light. I have a PAR meter, so I have the luxury of measuring the light in my tanks. My plants do just fine with about 100 umols up near the top of the tank, and REALLY low light (down below 10 umols) down on the bottom. Even Micranthemum tweedeii is growing quite happily, albeit slowly (emersed) with this level of light on the floor. Some mosses and Bucephalandra are growing in the shade of my Manzanita with even less light.
Micranthemum tweedeii at the bottom of the vivarium in quite low light, and growing just fine.
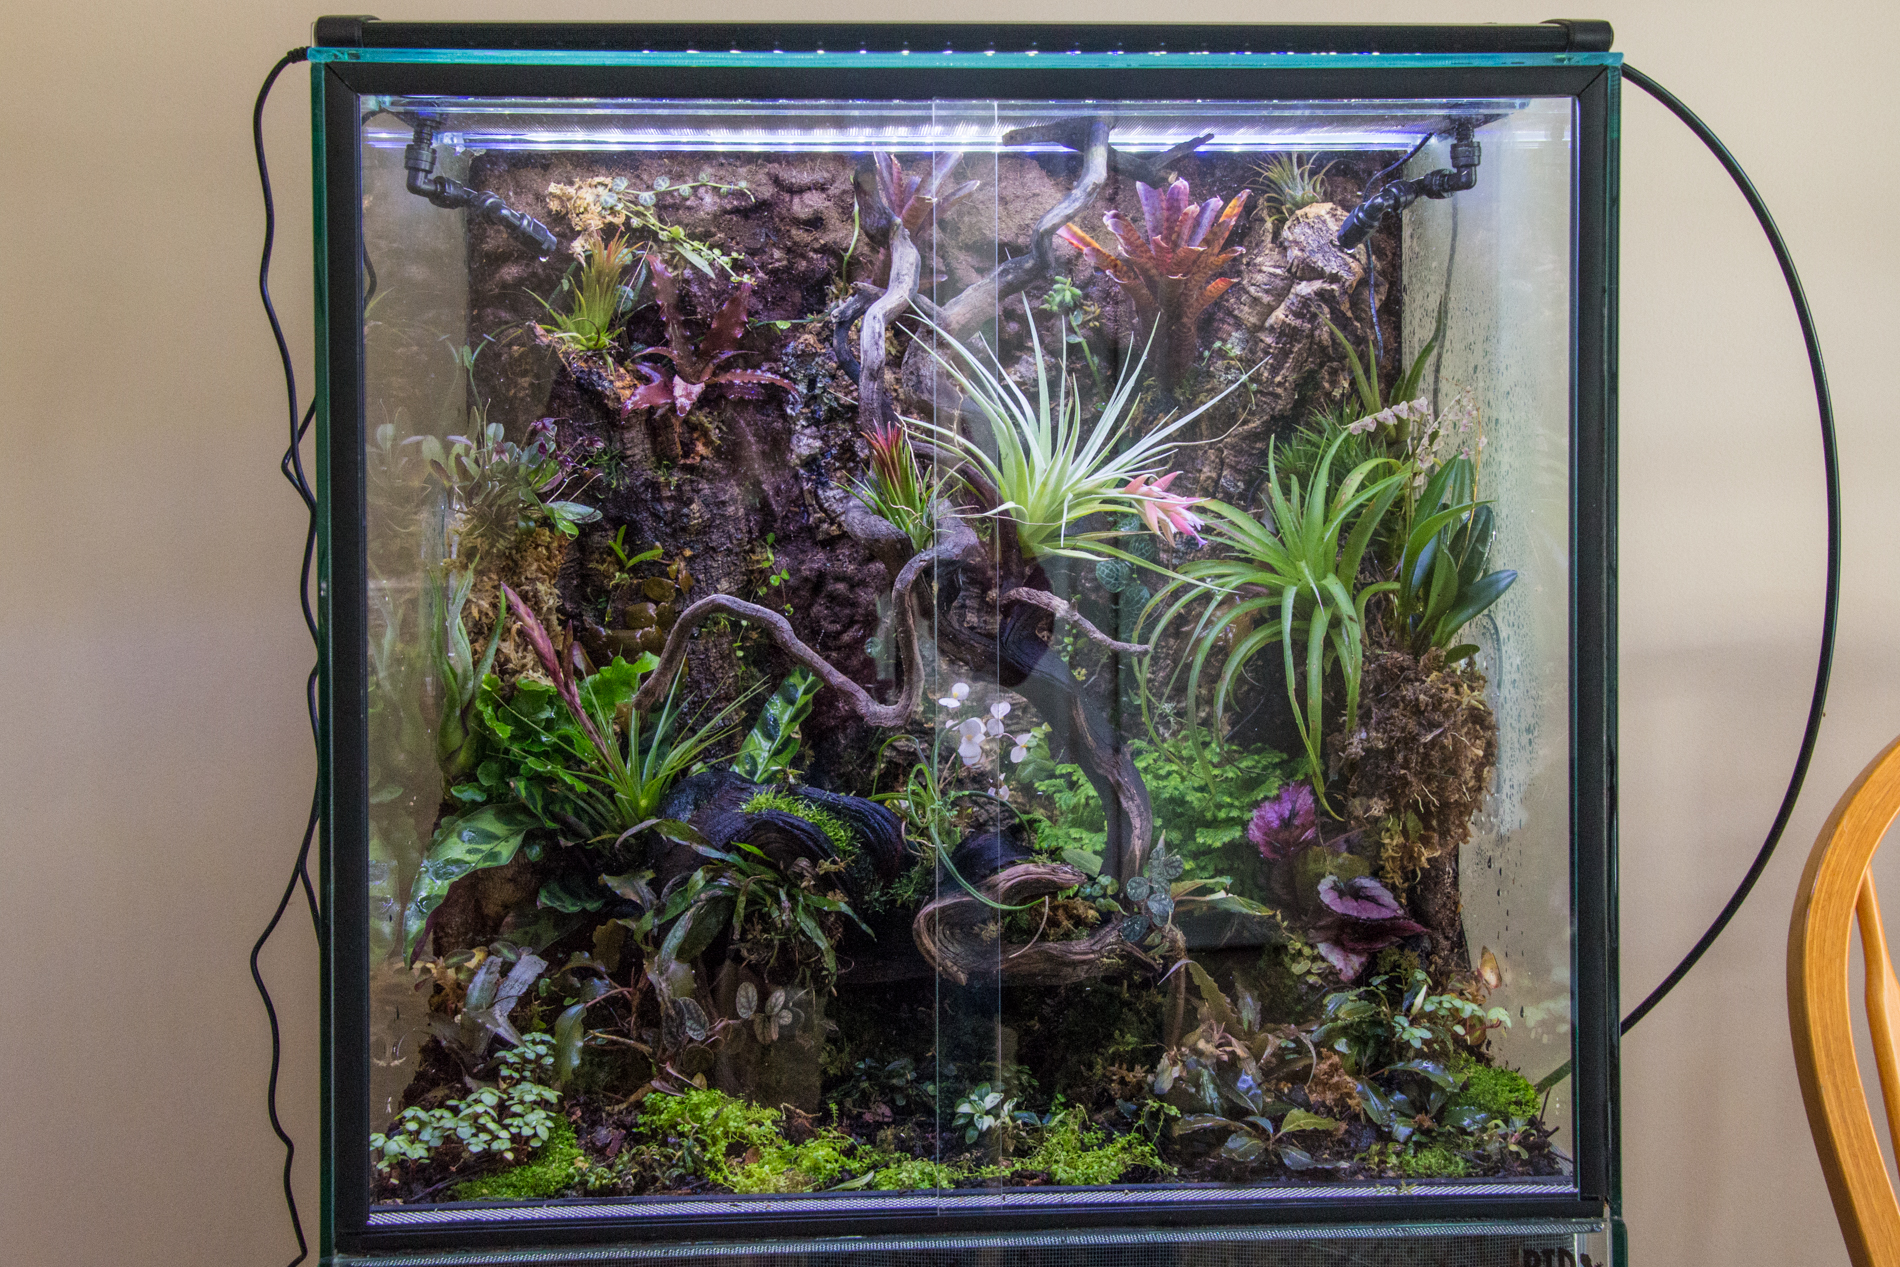
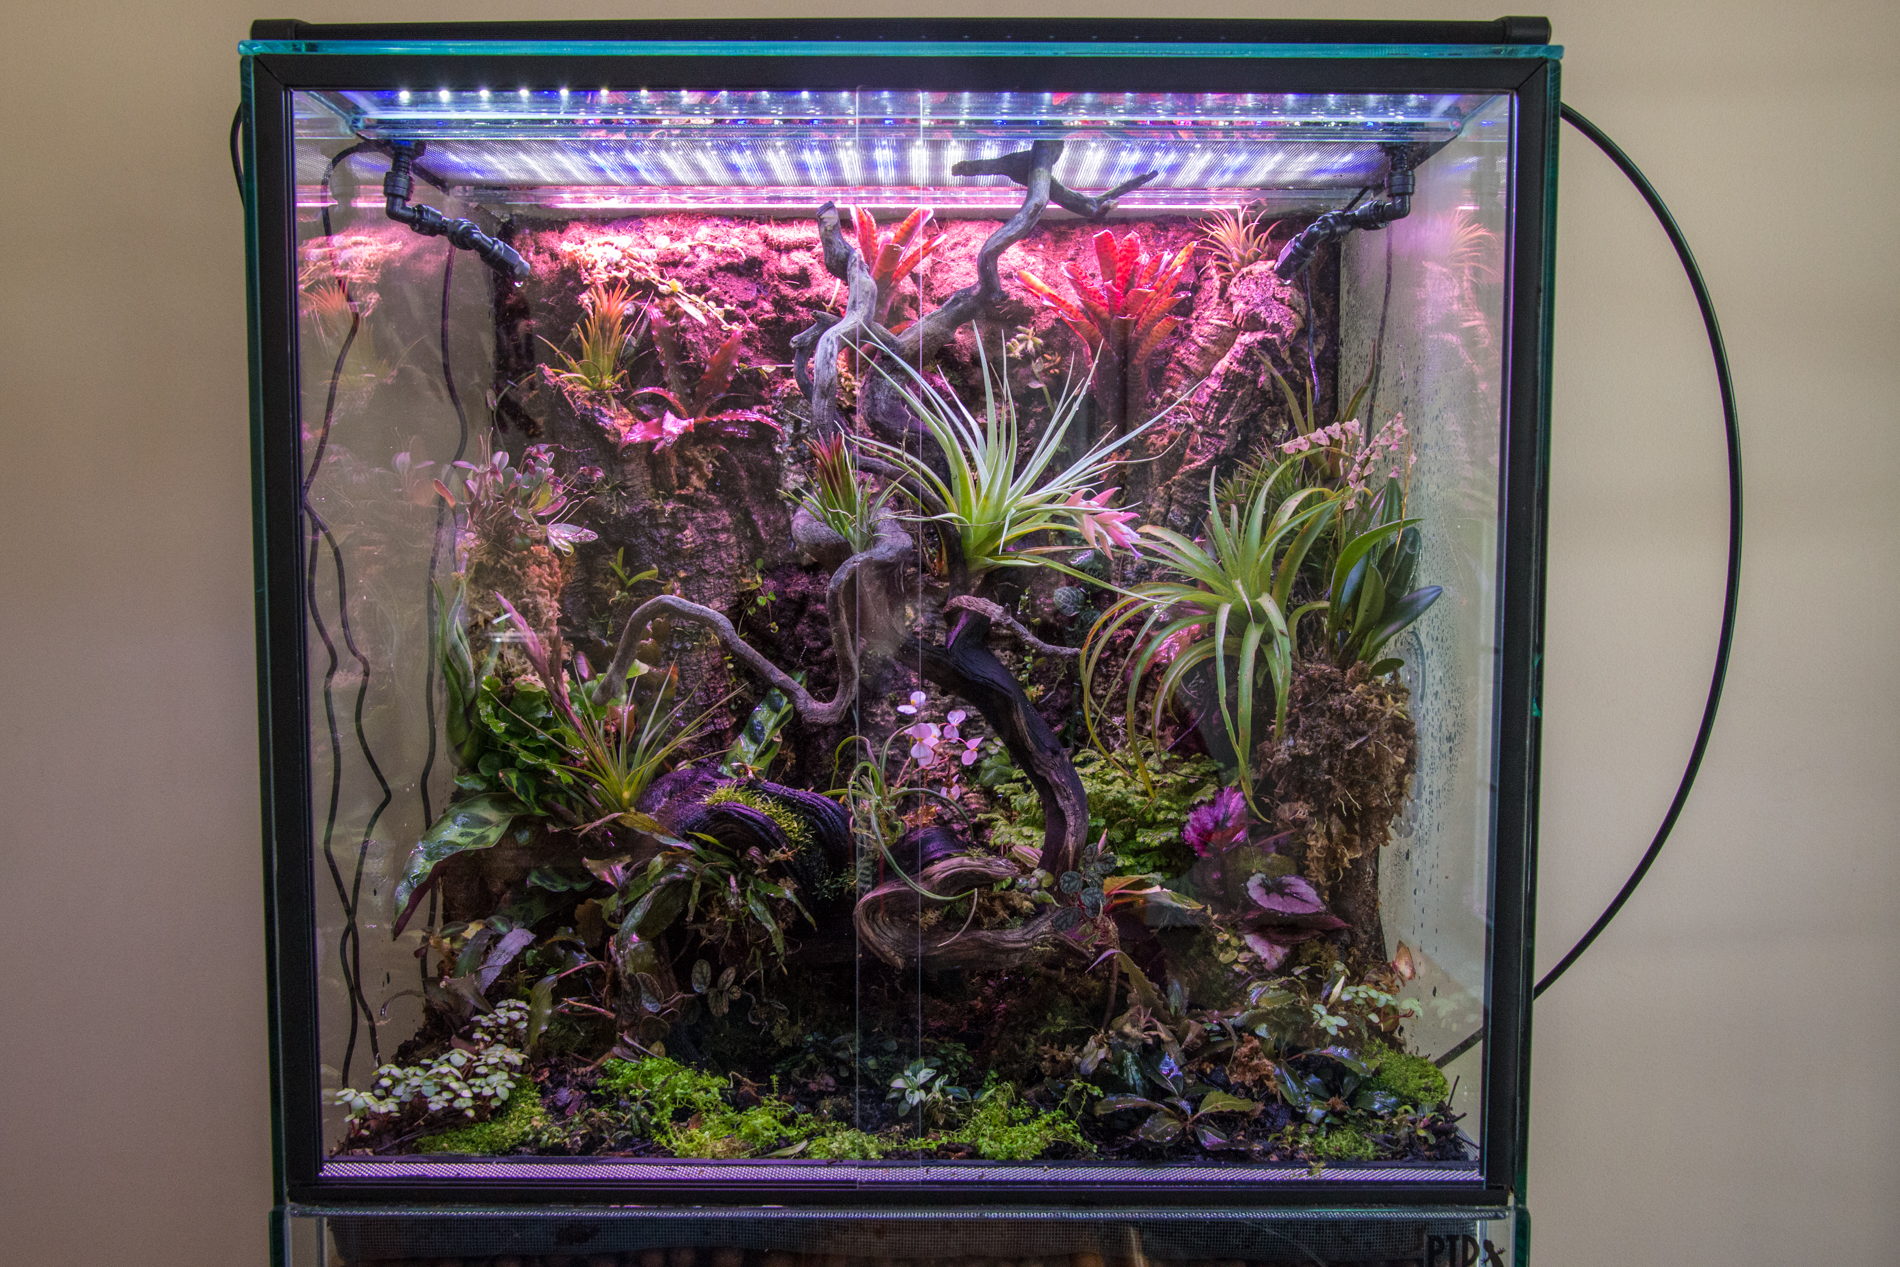
In the end, I went with two relatively inexpensive Honpal LED fixtures. These are black, low profile, run cool, and fit the top of the tank very well. They have a great spread and good color rendition, making the tank look very natural. Behind these I put one small Finnex light that I had sitting around. I don’t think this model is even sold anymore, but it has some red in it, but also has a diffuser shield over the LED’s so you don’t get the individual “spot” effect that you do with many modern LED’s. I put this at the very back, over my Neoregelias, and the Cryptanthus on the back wall. They clearly appreciate either the red light or the increased intensity focused on them, because they have responded with deep red color of their own.
Above you will see how different different lighting choices can make a tank look. All three of these photos were taken with the AWB turned off on my camera, and with different lighting arrangements on the vivarium. I finally chose the last arrangement as the best compromise between true to life color and giving my red plants what they needed.
The final step of the “hardware” part of the build was installing the MistKing. I am NOT comfortable with technology that is new to me. And this was WAY outside my comfort zone. But I also knew that the vivarium for the vivarium to survive when I travel with minimal skilled intervention a mist system was a must. I had read enough to know that MistKing was really the only viable option. You can get MistKing systems just about anyplace that sells vivarium supplies. I ordered mine via Amazon, though ultimately, I believe it came from Josh’s Frogs. I am not going to even try to give you step-by-step instructions here. I strongly recommend that you read the directions that come with it, cover to cover. Twice. Then read it again. Then go on YouTube and watch SEVERAL “how to” videos on setting one up. I never found one that was great, but I got enough tid bits out of several that I started to piece things together. When the directions from MistKing and the YouTube recommendations differed, I followed MistKing’s directions.
One crazy WRONG thing that several videos show is needing to place the reservoir above the vivarium. This is NOT necessary. The PUMP must not be above the reservoir, but the reservoir and the pump can sit side by side on the floor of the cabinet, below the vivarium, with no problem at all. There are other things that are just not addressed, either in the directions or in the YouTube tutorials. Like how many mist heads you might need to cover a certain size tank. I started with two double heads, quickly found that that was way too much, and replaced them with two single heads. I wish there was a better way than trial and error, but if there is one, I don’t know of it.
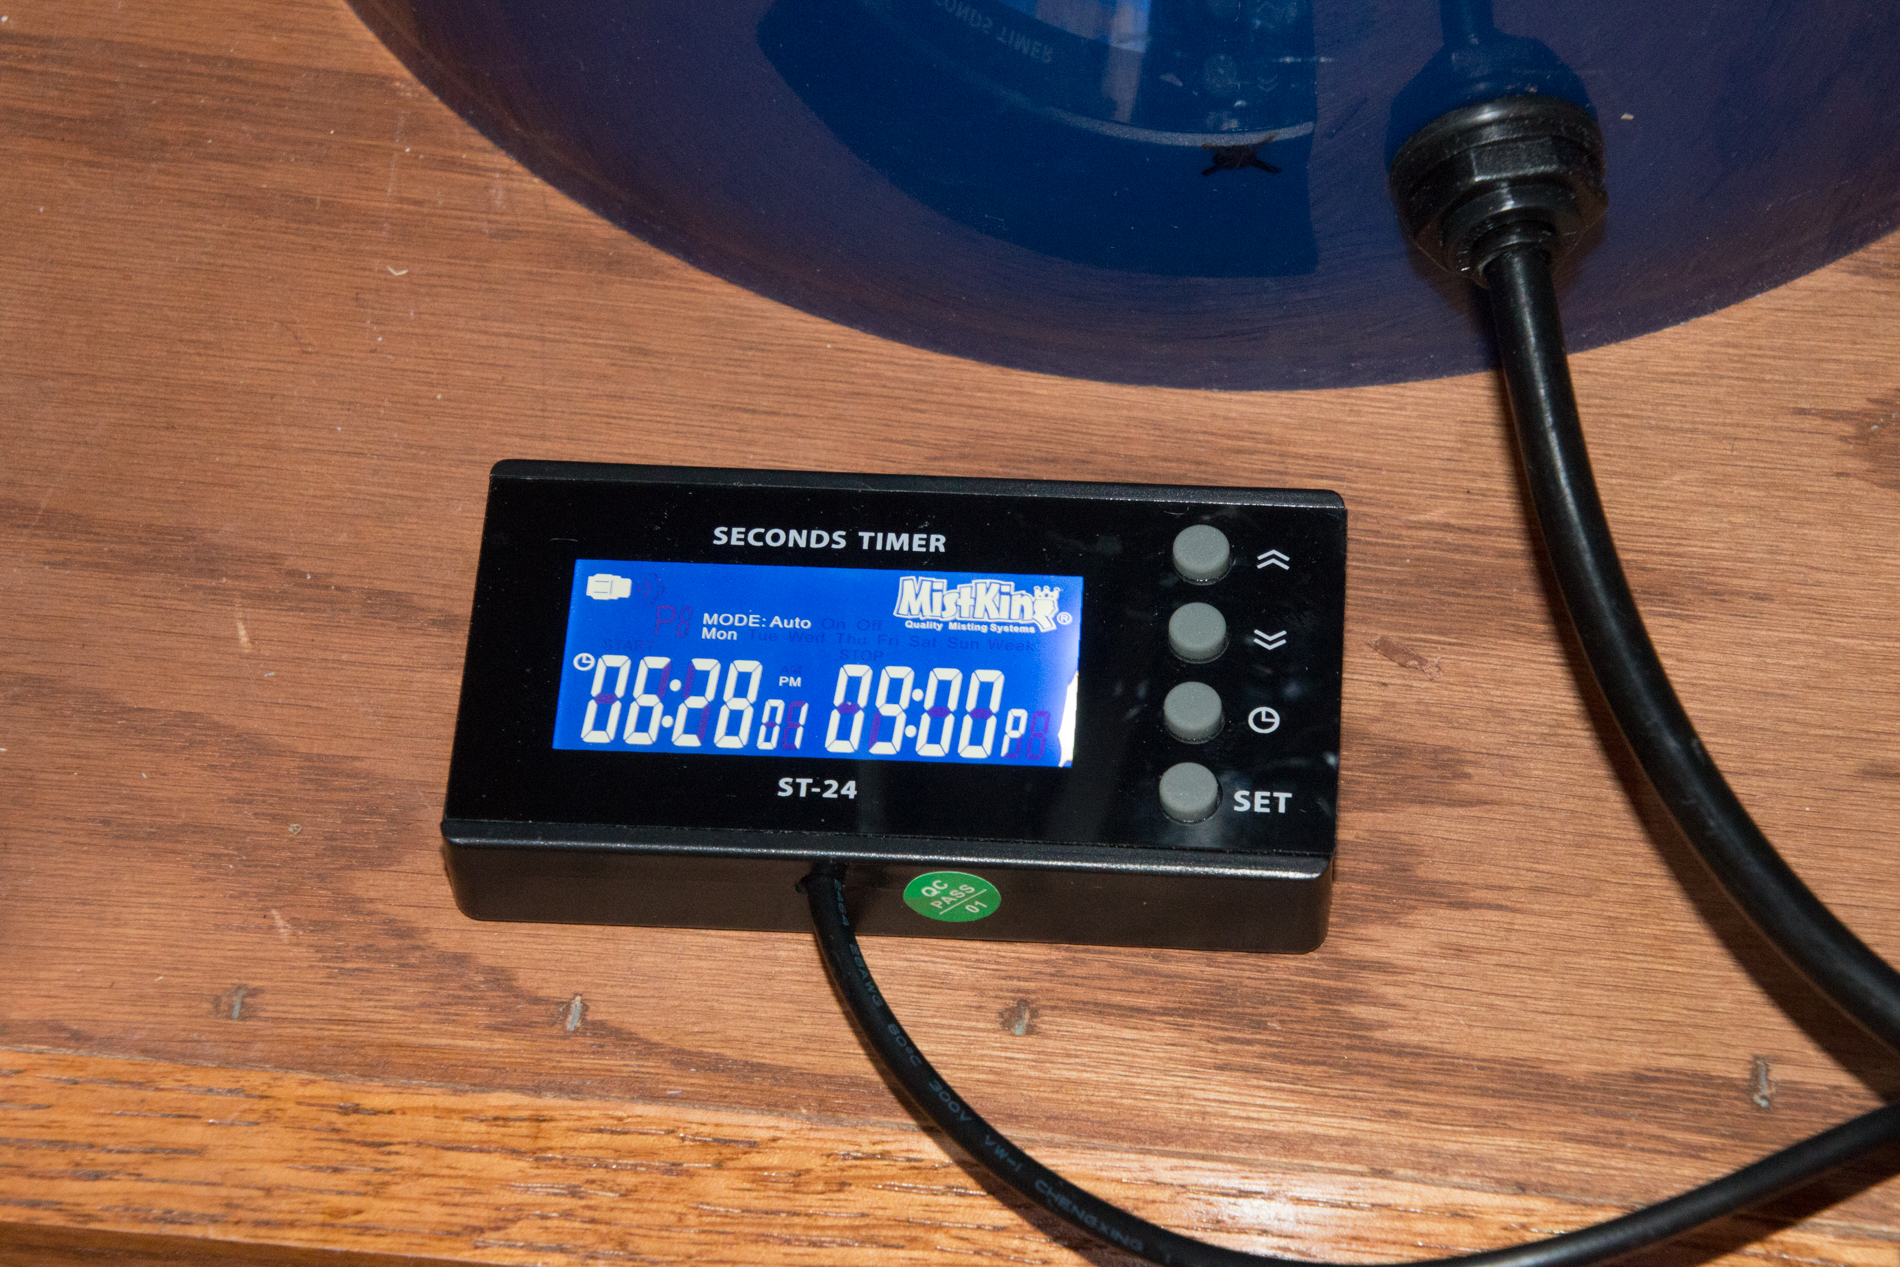
Other than drilling the hole in the 5 gallon bucket reservoir, (that power tool thing again) I really WAS able to set it up myself. If the hole is drilled correctly, and the edges are smoothed properly, the bulkhead fits tight with no leaking at all. Programming the timer is a bear. Worse, programming the timer, only to find that your first timer is faulty and leaves your mist system running non-stop overnight is not pleasant. (thank heavens for that drainage system!). But The MistKing people were great, and sent me out a new timer within 48 hours. I DID have to program the whole thing over again, but it has worked flawlessly since.
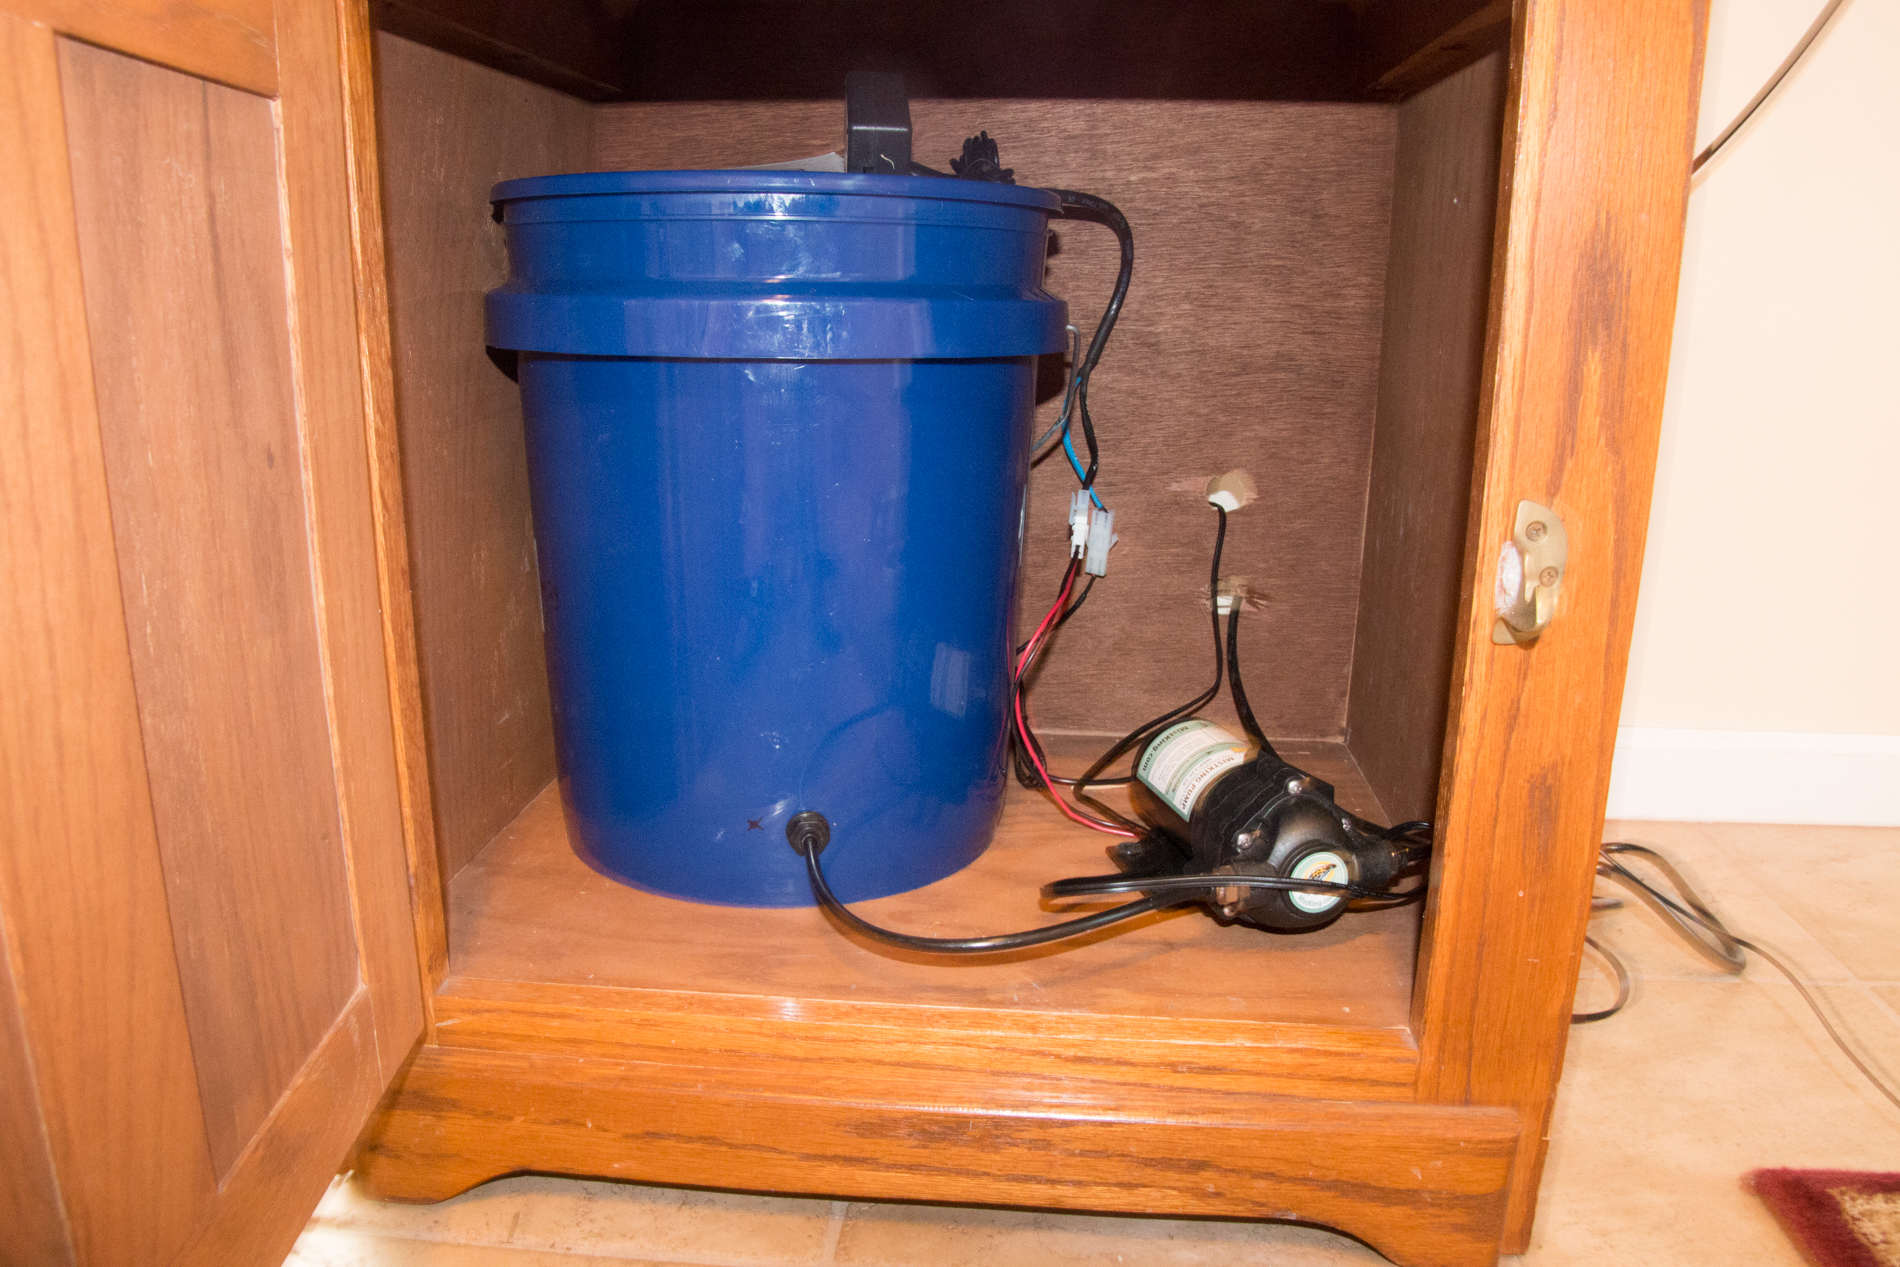
The MistKing reservoir and pump in the cabinet below the vivarium on the left, and the digital timer on the right. The timer does make a sort of sense once you get used to it, but it takes time to get the hang of it!
That brings up another point. Never EVER put more water in the reservoir than your drainage layer is capable of holding without overflowing. Otherwise It goes on the floor. A word to the wise.

